Google Tag Manager Auto-Event Tracking for Meta Pixel Events
In our previous guide, Meta Pixel Event Tracking with "Data Layer" and Google Tag Manager, we delved into the robust method of using the dataLayer to capture rich, dynamic data for your Meta Pixel events. This approach is incredibly powerful, especially for complex scenarios like e-commerce transactions or when you need to pass detailed custom parameters.
However, not every user interaction you want to track for your Meta Pixel campaigns requires a full dataLayer implementation.
Sometimes, you need to quickly and efficiently track simpler, yet equally important, on-page actions – a button click for a PDF download, a "Request a Demo" submission, or engagement with a specific link.
This is where Google Tag Manager's (GTM) auto-event capabilities truly shine. GTM comes equipped with functionality, often referred to as "event listeners", that automatically "listens" for common user interactions directly on your website, typically without needing any additional code on your site.
The key benefits? Easier setup for common events, reduced reliance on developers for these tasks, and the ability to leverage GTM's intuitive interface for greater control.
In this article, we'll guide you through leveraging GTM's auto-event tracking, focusing primarily on Tracking Clicks. Capturing clicks on specific buttons, links, or other elements to send valuable interaction data to your Meta Pixel.
While GTM can also track other interactions like form submissions and element visibility (which we'll briefly touch upon), this guide will provide a deep dive into mastering click tracking.
By the end of this article, you'll understand how to configure this powerful GTM feature to enhance your Meta Pixel event tracking for clicks, leading to more precise ad targeting and better campaign performance.
Before we jump into configuring auto-event tracking in Google Tag Manager for your Meta Pixel, let's ensure you have the following essentials in place. This will help you follow along smoothly and get the most out of this guide:
-
Google Tag Manager (GTM) Container Installed. Your website should already have a GTM container correctly installed and functioning.
-
Meta Pixel Base Code Implemented via GTM. We'll assume your Meta Pixel base code (the main pixel snippet) is already set up and firing on all relevant pages through Google Tag Manager. If you haven't done this yet, you'll need to complete that step first, you can refer to our guide: Meta Pixel with Google Tag Manager Setup.
-
Understanding of Meta Pixel Standard Events. You should be familiar with the concept of Meta's standard events (e.g.,
ViewContent,Lead,AddToCart,CompleteRegistration). Knowing what these events represent will help you choose the correct ones for the interactions you want to track. -
Basic GTM Familiarity. A foundational understanding of the Google Tag Manager interface, including how to create tags, triggers, and work with variables, is highly recommended. While we'll guide you through the specific steps, prior GTM experience will be beneficial.
With these prerequisites met, you're ready to explore how GTM's auto-event tracking can simplify your Meta Pixel setup for key user interactions!
At its core, Google Tag Manager is designed to simplify how you manage tracking codes (tags) on your website.
Beyond just deploying tags, GTM includes powerful built-in features that can automatically detect various user interactions on your web pages.
This capability is what we're referring to as "auto-event tracking" or, in GTM's own terminology for some of its trigger types, "event listeners".
How Does It Work?
Instead of you needing to write custom JavaScript code on your website to tell GTM that a user clicked a button or submitted a form, GTM can do much of this automatically. Here's a simplified breakdown:
-
GTM Listens. Once your GTM container snippet is on your page, it can be configured to actively listen for common browser events like clicks, form submissions, page timer intervals, or even changes in the browser's history, etc.
-
Interaction Occurs. When a user performs an action that GTM is listening for (e.g., clicks a link), GTM detects this interaction.
-
Internal GTM Event & Data Capture. GTM then fires an internal event within its own system (you'll see these in GTM's Preview mode). Critically, at this moment, GTM also automatically captures information about that interaction and makes it available through Built-In Variables. For example, for a click, it might capture the text of the clicked item (
Click Text), its URL (Click URL), its CSS classes (Click Classes), and its ID (Click ID). -
Triggers Evaluate the Data. The GTM triggers you configure will then look at these internal GTM events and the data captured in the built-in variables. If the conditions you've set in your trigger match the data from the interaction, the trigger fires.
-
Tags are Fired. If a trigger fires, any tags associated with that trigger (like your Meta Pixel event tag) will then execute.
The beauty of this system is that much of the detection and data collection for these common interactions is handled automatically by GTM, reducing the need for custom website code for these specific tracking scenarios.
While GTM offers several types of built-in event detection, for this guide on Meta Pixel event tracking, we'll primarily focus on Click Triggers.
By understanding how GTM can automatically listen for and provide data about these interactions, you can create highly specific triggers to fire your Meta Pixel events precisely when and where you want.
Before you can effectively use GTM's auto-event tracking features to identify specific clicks, you need to ensure that GTM is actively collecting the details of those interactions. This is done by enabling Built-In Variables.
Why is this important?
These built-in variables are the foundation of your auto-event triggers. For example, to create a trigger that fires only when a button with the text "Download PDF" is clicked, you'll need the Click Text variable to be enabled and populated by GTM. Without it, your trigger won't have the information to make that decision.
Navigate to the "Variables" section in your GTM workspace (from the left-hand menu).
Click the "Configure" button next to the "Built-In Variables" sub-section.
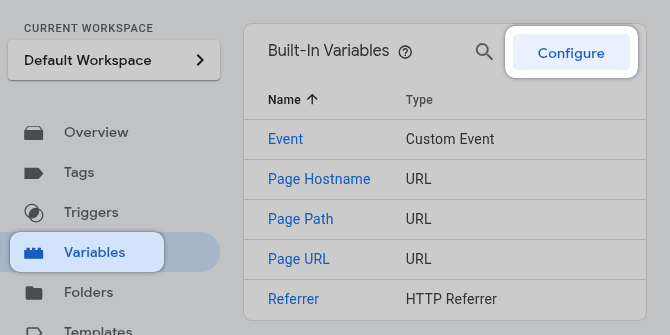
You'll need to check the boxes next to the variables relevant to the interactions you want to track.
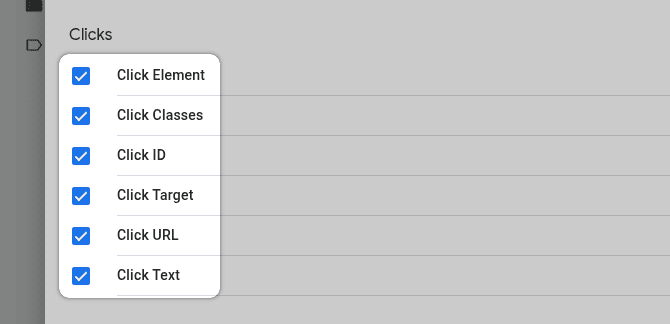
For tracking clicks effectively with your Meta Pixel, we highly recommend enabling following:
-
Click Element. The HTML element that was clicked. -
Click Classes. The CSS class(es) of the clicked element. -
Click ID. The HTML ID of the clicked element. -
Click Target. Thetargetattribute of the clicked link. -
Click URL. Thehrefattribute of the clicked element. -
Click Text. The visible text content of the clicked element.
Pages (often enabled by default, but good to check):
-
Page URL: The full URL of the current page. -
Page Hostname: The hostname part of the current page's URL. -
Page Path: The path part of the current page's URL.
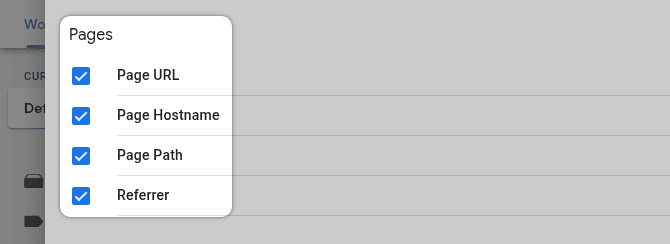
Once you've checked the boxes for these variables, simply click outside the panel to close it. GTM will automatically save your selections.
With these variables enabled, GTM will now populate them with data whenever relevant interactions occur, making this data available for you to use in your trigger conditions. This is a one-time setup step for these variables in your container.
Many valuable user interactions on your website culminate in a simple clicks. Whether it's a click on a "Download PDF" button, a "Request a Demo", a link to view product details, or an outbound link to a partner site, tracking these clicks can provide crucial data for your Meta Pixel.
This data can then be used to optimize your ad campaigns, create custom audiences, and better understand user engagement.
For example:
-
Clicking on email link could be tracked as a
Contactstandard event. -
Clicking a "View Product" link from a category page could be a
ViewContentstandard event. -
Clicking a "Learn More" button about a specific service could be a custom event like
ServiceLearnMore.
Let's walk through how to set this up in Google Tag Manager. We'll use the example of tracking clicks on a button with the text "Download Free Guide" and sending a Lead event to Meta.
First, we need to tell GTM when to fire our Meta Pixel event tag. This is done by creating a trigger that listens for the specific click.
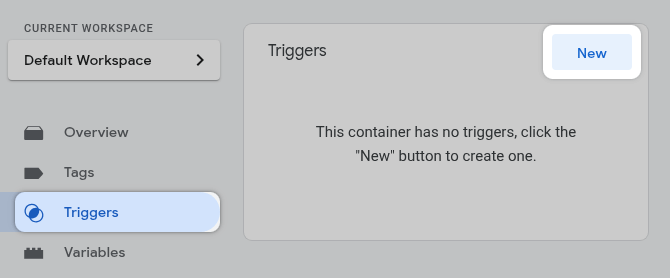
In your GTM workspace, go to "Triggers" in the left-hand menu and click the "New" button.
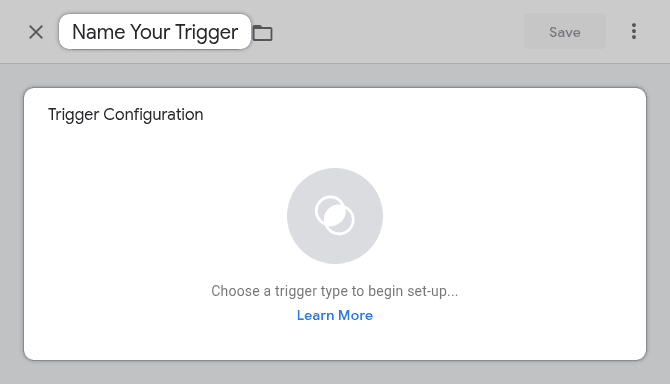
Give your trigger a descriptive name (e.g., "Click - Button - Download Free Guide").
And click "Trigger Configuration" area.
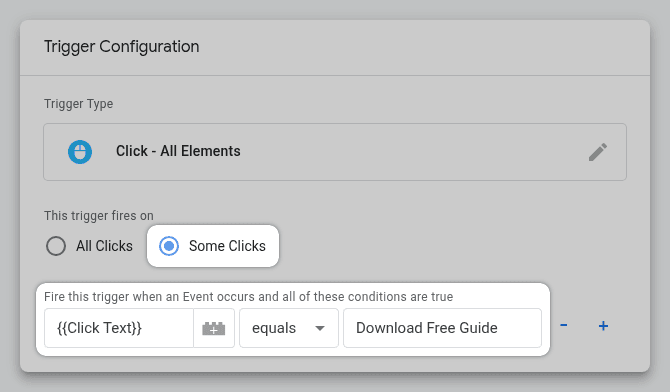
Under the "Click" section, choose "All Elements".

Select "Some Clicks". This is crucial, as you only want the trigger to fire for your specific "Download Free Guide" button, not every click on the page.
For our example, let's assume the button text is "Download Our Free Guide".
Set the condition as follows:
-
{{Click Text}} -
equals -
Download Free Guide
Click the "Save" button in the top right corner.
Pro Tip
The best way to identify which variable and value to use is with GTM's Preview mode. Click around on your site, inspect the
gtm.clickevents in the Preview pane, and look at the "Variables" tab to see what values GTM populates forClick Text,Click ID,Click Classes, etc., for your target element.
Now that we have our trigger, let's create the Meta Pixel tag that will send the Lead event when this trigger fires.
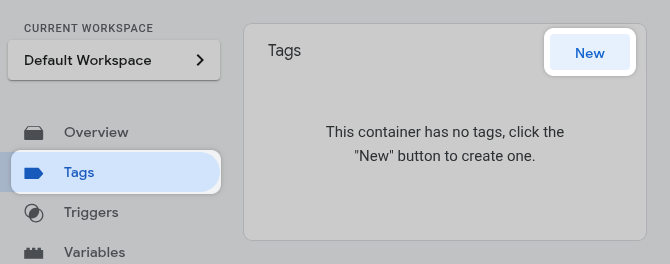
In your GTM workspace, go to "Tags" in the left-hand menu and click "New".
Give it a descriptive name (e.g., "Meta Tag: Lead - Download Guide Click").
Next click "Tag Configuration".
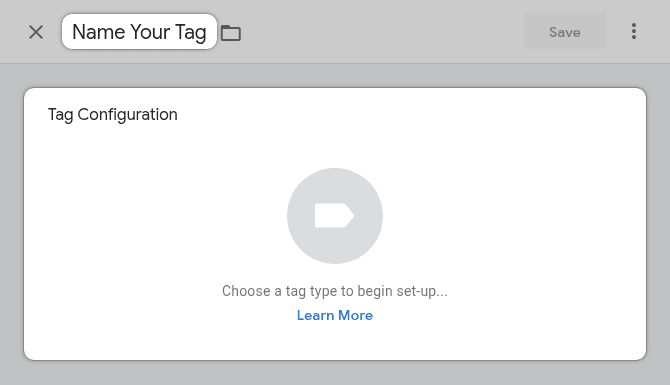
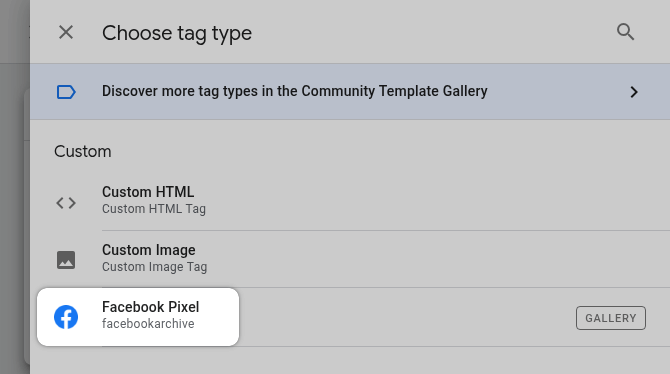
Search for and select the "Facebook Pixel" tag template from the Community Template Gallery (if you haven't used it before, you'll need to add it to your workspace).
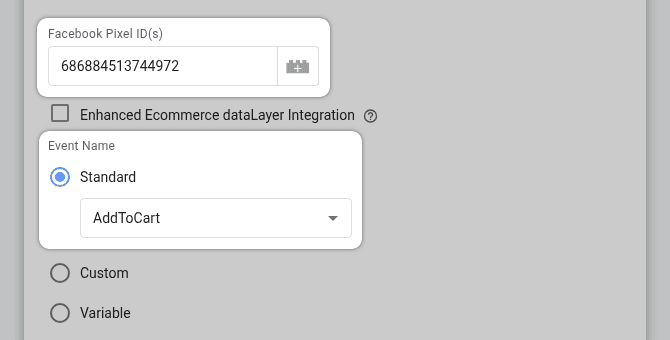
Enter your Meta Pixel ID into the "Facebook Pixel ID(s)".
Under the "Event Name" from the "Standard" dropdown, select Lead.
Pro Tip
Send additional data for your tag using "Object Properties". In our example, for the "Download Free Guide" Lead event, consider adding:
- "Property Name":
category, and "Property Value":link_click- "Property Name":
link_text, and "Property Value":{{Click Text}}.This is valuable for richer reporting and audience building in Meta.
Click on the "Triggering" box below the tag configuration.
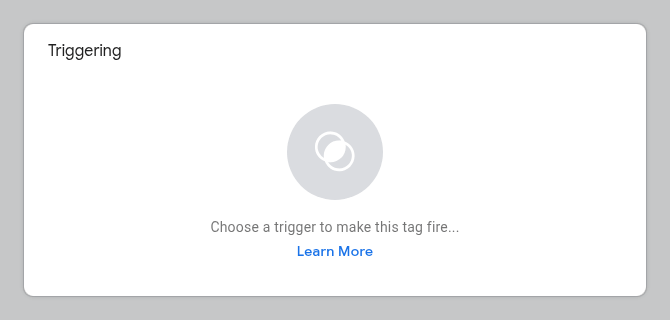
Select the click trigger you created in Step 1.
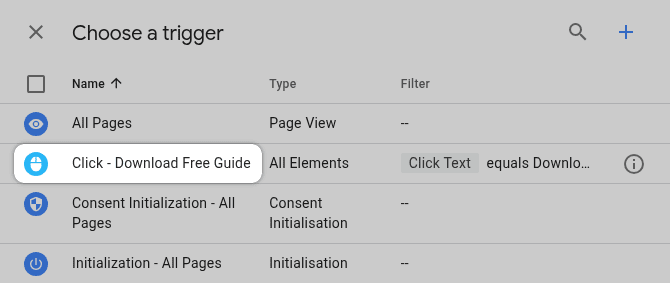
Click the "Save" button.
Thorough testing is essential to ensure your new tag and trigger are working as expected.
Click the "Preview" button in the top right.

Enter your website's URL and click "Connect".
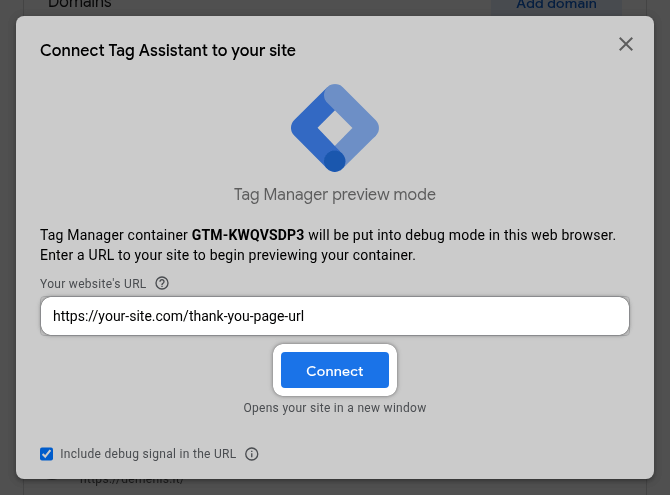
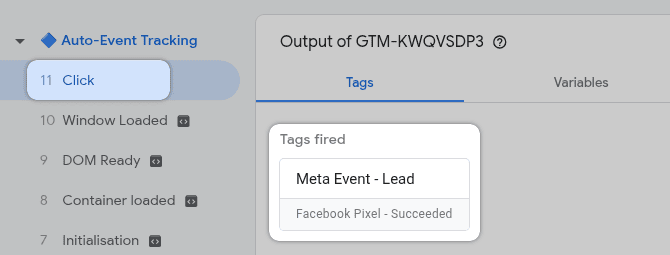
For our example we'll navigate to the page with the "Download Free Guide" button and click it.
In the Preview Mode console, look for Click event in the event timeline on the left.
You should see your Meta Pixel tag listed under "Tags Fired".
Go to your Meta Business Suite.
From the main menu click on "All tools".

Find and select "Events Manager".

In Events Manager, on the left-hand side, click on "Data sources".
Next, click on your Meta Pixel.
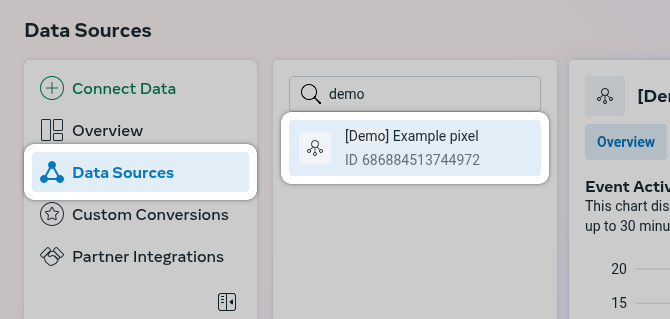
Go to the "Test Events" tab.
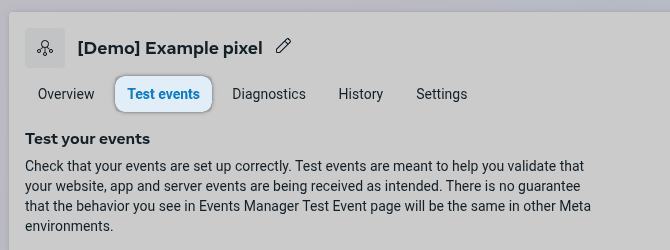
Now, refresh your web page in GTM preview mode.
Click on the link to trigger a tag.
You should see the Lead event appear here within a few seconds to a couple of minutes.
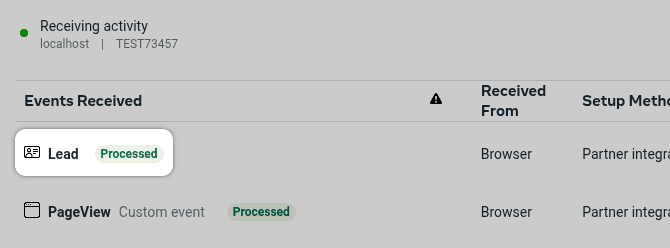
Once you've confirmed everything is working correctly, go back to your GTM workspace, click "Submit", give your version a name and description and then "Publish".
By following these steps, you can effectively track various button and link clicks as Meta Pixel events, giving you richer data for your advertising efforts.
You can adapt the trigger conditions and Meta Pixel event names/properties for any click-based interaction you want to monitor.
While this guide has focused on mastering click tracking for your Meta Pixel events, Google Tag Manager's auto-event tracking capabilities extend further.
Understanding these can open up even more opportunities for precise event tracking as your needs evolve. Here are a couple of other notable built-in GTM features:
-
Form Submission Tracking. GTM can detect when users submit forms on your website. This is incredibly useful for tracking leads, newsletter sign-ups, contact requests, or search queries directly as Meta Pixel events (e.g.,
Lead,CompleteRegistration,Search). It allows you to capture conversions that happen via forms, especially those that don't redirect to a unique "thank you" page.Due to the various nuances and techniques involved in robust form tracking, we'll be covering this topic in-depth in a future dedicated article, including how advanced solutions like Branchside form builder can simplify this process with built-in conversion tracking.
-
Element Visibility Tracking. GTM's element visibility trigger allows you to fire a tag when a specific HTML element (or elements) becomes visible in the user's browser viewport. This helps you understand if users are actually seeing important parts of your pages, providing insights beyond just page views or clicks.
-
Scroll Depth Tracking. GTM can track how far down a page a user scrolls (e.g., 25%, 50%, 75%, 100% of page height). This is excellent for measuring content engagement, especially on long-form articles or landing pages. You could send custom Meta Pixel events based on scroll milestones to identify highly engaged users.
These are just a few examples. GTM also offers triggers for YouTube video interactions, history changes (for single-page applications), and timer-based events. Exploring these options within GTM can further enhance the granularity of your Meta Pixel tracking.
For interactions that require passing complex or dynamic data not readily available via these built-in listeners, remember that the dataLayer method (covered in our previous article) remains a robust solution.
Implementing click tracking for your Meta Pixel events using GTM's auto-event capabilities is powerful, but keeping a few best practices in mind will ensure your setup is robust, accurate, and maintainable.
-
Specificity is Key in Triggers. Make your trigger conditions as specific as possible.
-
Whenever possible, use unique HTML
IDs (e.g.,Click IDequalsspecific-button-id). -
If IDs aren't available, combine multiple conditions:
Click Textequals"Download Brochure"ANDPage Pathcontains/product-x/. -
Use specific CSS classes if they are unique to the element you want to track (
Click Classescontainsunique-download-button-class).
-
-
Descriptive Naming Conventions. As your GTM container grows, vague names like "Click Trigger 1" or "Meta Tag" become confusing. Establish a naming system early on. This makes debugging and managing your GTM setup much easier in the long run.
-
Test Thoroughly Across Browsers and Devices. Website elements can sometimes behave or render differently across various browsers or on mobile versus desktop. Use GTM Preview mode to test it on major browsers (Chrome, Firefox, Safari, Edge) and on different device types (desktop, tablet, mobile).
-
Be Mindful of Website Changes. GTM's auto-event click tracking often relies on the HTML structure of your website (IDs, classes, text). If developers change the website's code (e.g., rename an ID, alter button text, change class names), your triggers might break without warning.
-
Use
Click Textwith Caution for Multi-Language Sites. If your website supports multiple languages, button or link text will change. A trigger based onClick Textequals"Download Now"will only work for the English version. -
When Auto-Event Click Tracking Might Not Be Enough? For highly dynamic interactions, clicks that load content via AJAX without clear DOM changes identifiable by GTM's click listeners, or when you need to pass very complex, structured data with the event that isn't readily available as a built-in variable.
This is where the
dataLayer.push()method, as discussed in our Meta Pixel Event Tracking with "Data Layer", becomes essential. It gives developers explicit control to send precise data to GTM when an event occurs.
By keeping these points in mind, you can create more effective and reliable Meta Pixel click tracking setups using Google Tag Manager.
Mastering Meta Pixel event tracking is a crucial step towards maximizing the effectiveness of your Facebook and Instagram advertising campaigns.
Throughout this guide, you've learned how to leverage GTM's built-in click listeners, configure precise triggers based on element identifiers like Click Text, and send this data as standard or custom events to your Meta Pixel.
This allows you to gain deeper insights into user engagement, build more targeted custom audiences, and ultimately optimize your ad spend for better results – all without necessarily needing to write new code on your website for every interaction.
Exploring different trigger conditions and GTM's other auto-event capabilities will continue to enhance your tracking prowess.
We encourage you to experiment and discover how these tools can best serve your specific measurement goals. Keep an eye out for future articles where we'll explore other GTM tracking methods, including a deep dive into form submissions.
We hope this guide empowers you to enhance your Meta Pixel click tracking using Google Tag Manager! If you have any questions about the techniques covered, tips from your own experience, or other insights to share about GTM auto-event tracking, please join the conversation in the comments below. We'd love to hear from you!
Leave a comment
The email address you provide will not be published. It will be used to notify you of any replies.