Form Conversion Tracking in Google Ads: A Step-by-Step Guide

You're running Google Ads. Clicks are climbing, and your ad spend is increasing. But do you know exactly how many of those clicks are turning into actual leads?
If the answer is a shrug, a guess, or "I think so...", you're likely wasting a significant portion of your budget.
Without a reliable way to track when a user fills out your contact form, you're unable to distinguish high-performing keywords from budget-draining duds, and powerless to prove your campaign's true value.
This is where Google Ads conversion tracking comes in. It's the bridge between a user clicking your ad and then becoming a valuable lead for your business. It's not just a nice-to-have feature; it's the foundational element of any successful lead generation campaign.
In this step-by-step guide, we will demystify the entire process. You will learn how to:
-
Create the "Submit lead form" conversion action inside Google Ads.
-
Implement the tracking tag using the method that best fits your website:
-
Tracking a "Thank You" page view (the classic approach).
-
Tracking the visibility of a success message (for forms that don't redirect).
-
Using Branchside form's built-in event tracking (the most robust method).
-
-
Verify that your tracking is set up correctly and capturing data.
By the end of this article, you'll have the power to stop guessing and start making data-driven decisions that generate real results.
Before we jump into the setup, it's important to understand why this is one of the most critical actions you can take for your Google Ads account. Setting up conversion tracking isn't just about adding another metric to a dashboard; it's about fundamentally transforming your advertising from an expense into a measurable investment.
This is the most important reason. Google's powerful automated bidding strategies—like Maximize Conversions and Target CPA — rely entirely on conversion data to function.
Without it, the algorithm has no idea which clicks are valuable. By feeding it accurate data on which users are submitting forms, you enable the system to automatically find more people just like them, optimizing your campaigns for leads, not just clicks.
Clicks and impressions are vanity metrics. Leads are what drive your business. With conversion tracking, you can finally answer the most important questions:
-
Which campaigns are actually generating leads?
-
Which keywords are worth your investment?
-
What is our cost per lead (CPL)?
This data allows you to confidently allocate your budget to what works and cut what doesn't, directly impacting your bottom line.
Once you know what's converting, you can optimize every part of your account with precision.
-
Ad Copy. Test different headlines and descriptions to see which ones drive the most form fills.
-
Landing Pages. See which page designs or calls-to-action result in higher conversion rates.
-
Audiences & Demographics. Discover which groups of users are most likely to become a lead.
Without tracking, you're just guessing. With it, every decision is backed by data. In short, implementing conversion tracking is the line between amateur and professional campaign management.
Before we can track anything on your website, we first need to tell Google Ads what a conversion is. In this step, we will create a goal called "Submit lead form" inside your account.
This process is the same no matter which implementation method you choose later.
Let's get started.
Log in to your Google Ads account.
In the left menu, click on "Goals" then select "Summary" under the "Conversions" heading.

On the Conversions summary page, click the blue "New conversion action" button.

Google will ask you what kind of conversions you want to track.
Select "Conversions on a website" and add your website URL using the "Add URL" button.

On the next screen, enter your website URL and click "Scan".

Select "Google tag" option.
If you don't have the Google Ads tag installed on your website yet, don't worry. We will cover exactly how to install it in the next section of this guide.

Click "Save and continue".
Select "Submit lead form" from the list.

Next, select "Set up manually using code" option.

Below, you'll see the "Conversion settings" box with a list of settings for the conversion. Here are the recommended settings:
Action optimization
Choose "Primary action used for bidding optimization".
Value
It is recommended to set the lead value. The simplest way is to calculate your lead-to-sale conversion rate and your average revenue per sale, then multiply these two numbers together. This result is the value you can set by selecting "Use the same value for each conversion".Example: If 10% of your leads become customers (10% conversion rate) and your average sale is $500, multiply 0.10 × $500 = $50. This means each lead is worth $50, which is the value you should enter.
If you don't know your numbers, select "Don't use a value for this conversion action".
Count
Set this to "One", so only unique form submissions will count.
You can leave the other settings as they are and click "Done".
Next, click "Save and continue".
On the "Summary" page scroll down and click "Finish" or "Agree and finish" button.
You have now successfully created your conversion action. Google Ads will take you to a new page showing you the code snippets needed for installation. We will tackle that in the next section.
You've successfully created the conversion action in your Google Ads account. Now, it's time to connect it to your website so it can start recording form submissions. This is done by adding a couple of code snippets to your site.
There are two primary ways to do this:
-
Method A: Using Google Tag Manager
This is the recommended method for most marketers. Google Tag Manager (GTM) is a free tool that acts as a container for all your tracking tags. Instead of adding multiple code snippets to your website, you add GTM once, and then manage everything (Google Ads, Analytics, Facebook Pixel, etc.) from the GTM interface. It's more flexible, powerful, and scalable in the long run. -
Method B: Using the Google Ads Site Tag (gtag.js)
This is the direct method. It involves adding the Google Ads code snippets directly into your website's HTML. It's a perfectly good option if you don't use GTM and only need to add a few simple tags.
If you don't already have Google Tag Manager set up, you can create a free account and install it by following Google's official setup guide.
Once GTM is installed, we will create two separate tags. This is the modern, recommended approach:
-
A Google Tag that establishes the basic connection with your Google Ads account on all pages.
-
A Conversion Tracking Tag that fires only when a form is submitted.
This first tag is responsible for sending basic page view data to Google Ads from every page of your site.
In your GTM container, navigate to "Tags" and click "New".

Give your tag a descriptive name, like "Google Ads - Base Configuration".
Click on "Tag Configuration".

Under "Choose tag type", find and select the "Google Ads" tag.

Select "Google Tag" from the list

Now, we need your Tag ID. Go back to your Google Ads account and navigate to the conversion action you created earlier (Goals > Summary).
Under "All your goals" in the "Submit lead form" table click on your conversion name.

Click into the "Tag setup" section.

Select the "Install the tag yourself" tab.

In the code snippet, find and copy the tag ID that starts with AW-.

Don't close the Google Ads goal settings window. You'll need it later.
Return to GTM and paste this ID into the "Tag ID" field.

Under Triggering, select the "Initialization - All Pages" trigger. This is critical as it ensures this tag loads first on every page.

Click "Save".
The trigger tells our final tag when to fire. We'll set it to fire when a user lands on your "Thank You" page.
In your GTM container, click on "Triggers" in the left-hand navigation menu.
Next, click the "New" button to create a new trigger.

Give your trigger a descriptive name. Example: "Page View - Lead Form Thank You".
Start the Trigger Configuration by clicking anywhere on the large "Trigger Configuration" box.

For "Choose trigger type," select "Page View".

Under "This trigger fires on", select "Some Page Views".
This is where you specify your "thank-you" page URL.
In the first input, choose a variable {{Page URL}}.
In the second dropdown, select "contains".
In the text box, enter the unique part of your "thank-you" page URL path. Example: /thank-you-page-url
And click on "Save".

Now that our base tag and trigger are ready, let's create the final tag that records the actual conversion event.
Go to "Tags" and click "New".
Name your tag so you'll recognize it, for example: "Google Ads - Lead from conversion".
In the tag configuration select "Google Ads" type again.
Choose "Google Ads Conversion Tracking".
Go back to your Google Ads goal settings:
-
Click on "Use Google Tag Manager" tab.
-
Copy "Conversion ID".
-
Copy "Conversion label".

Return to GTM and paste these into the appropriate fields in your tag.
Scroll down and click on the "Triggering" box below the tag configuration.

Select the trigger you created in previous step (e.g., "Page View - Lead Form Thank You").

Click the "Save" button in the top right corner.
Before making your changes live, it's crucial to test them.
Important: Disable Ad Blockers During Testing!
Many ad blocker browser extensions will prevent the GTM from loading. To ensure your testing is accurate, please temporarily disable your ad blocker(s).
Click the "Preview" button in the top right.

Enter your website's URL and click "Connect".
You can enter your final "thank-you" URL directly. Or you can enter the page with contact form first on the page, fill the form, and the result after the actual redirect.

After you land on your "thank-you" page, look at the GTM debug pane.
Under the "Tags Fired" section you should see your conversion tag event tag listed (e.g., "Google Ads - Lead from conversion").
Once you're confident it's working correctly, go back to GTM.
Click the "Submit" button in the top right.

Give your version a descriptive name and click "Publish".
Your conversion tracking is now live!
Choose this method if you don't use GTM and prefer to add code directly to your website.
This process has two parts:
-
Installing the main Global Site Tag.
-
And then adding a specific Event Snippet for your conversion.
The Global Site Tag (gtag.js) is the main tracking code for Google products. It needs to be on every page of your website.
Go to your Google Ads account and navigate to the conversion action you created earlier (Goals > Summary).
Under "All your goals" in the "Submit lead form" table click on your conversion name.
Click into the "Tag setup" section.
Select the "Install the tag yourself" tab.
You will see a block of code that starts with <!-- Google tag (gtag.js) -->. Copy this entire snippet.
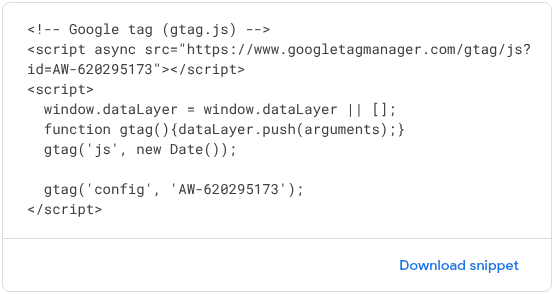
Paste this code in between the <head></head> section of your website's HTML on every single page.
The "Event Snippet" is a smaller piece of code that fires the specific conversion you created. This snippet should only be placed on the page that confirms a successful form submission.
On the same "Google tag" tab in Google Ads, scroll down to the "Event Snippet" section.
Make sure the "Page load" option is selected.

Copy the entire event snippet code.
Paste it in between the <head></head> tags of the page(s) you'd like to track, right after the Google tag (previous code snippet).
Once you've added both the Global Site Tag to all pages and the Event Snippet to your confirmation page, your conversion tracking is active.
What if your form doesn't redirect to a "Thank You" page? Many modern forms, especially those in pop-ups or on single-page applications, simply display a success message like "Thank you! We'll be in touch soon" on the same page. In this situation, tracking a page view won't work.
Possible solution for this is to use Google Tag Manager to track the visibility of that success message itself. When the message appears on the screen, we'll fire our conversion tag and tracking forms that don't redirect.
Prerequisite: Google Tag Setup
Make sure you have your Google Tag (Base Configuration) implemented.
To do so, you can follow Step 1 and Step 2 from the Option 1: Tracking a "Thank You" Page Conversion section.
Before we start, you need to identify your success message element in the page's HTML. The best way is to find its unique "ID" or a specific "CSS Class".
Go to the page with your form and submit it successfully to make the message appear.
Right-click on the success message and select "Inspect".

Your browser's Developer Tools will open, highlighting the HTML code for that element.
Look for an id="..." or class="..." attribute. An ID is always the best choice because it's unique. For this example, let's say our message contains an CSS class of form-success-message.

In your GTM container, navigate to Triggers and click New.

Name your trigger something descriptive, like "Element Visibility - Form Success Message".
Click on Trigger Configuration.

Choose the Element Visibility trigger type.

Under Selection Method, choose CSS Selector and enter the class name you found with the dot at the beginning (e.g., .form-success-message).
Dot usage for CSS Selector
When using CSS Selector, we have to add dot (.) at the beginning of the class name (e.g.,
.form-success-message). Unlike IDs, classes aren't unique, but we can combine multiple classes joining them together via dot to target a specific element. For example.form1.form-success-message.You don't have to add dot when using an ID.
Select "Every time an element appears on screen" under the "When to fire this trigger".
Set "Minimum Percent Visible" to 1.

Check the box for Observe DOM Changes. This allows GTM to detect elements that are added to the page dynamically after the initial page load, which is exactly how most AJAX success messages work.

Click "Save".
Go to "Tags" and click "New".
Name your tag so you'll recognize it, for example: "Google Ads - Lead from conversion".
In the tag configuration select "Google Ads" type again.
Choose "Google Ads Conversion Tracking".
Go back to your Google Ads goal settings:
-
Click on "Use Google Tag Manager" tab.
-
Copy "Conversion ID".
-
Copy "Conversion label".
Return to GTM and paste these into the appropriate fields in your tag.
Scroll down and click on the "Triggering" box below the tag configuration.
Select the element visibility trigger we've created earlier.

Click the "Save" button.
You have successfully configured your Google Ads tag to fire when the success message appears. Remember to use the Preview mode to test that the tag fires correctly, and then Publish your container to make the changes live.
While the first two methods can work, they are susceptible to errors that can break your tracking or lead to inaccurate data.
The Weaknesses of Other Methods:
-
The "Thank You" Page Problem. This method is fragile for two key reasons. First, a user could bookmark, share or reload the thank you page, firing a conversion event without ever submitting a form, leading to inaccurate data. Second, the URL is a weak link. If another team member renames the page slug (e.g., from
/thank-youto/thanks), your trigger breaks instantly and all tracking stops. This is a common issue. -
The Element Visibility Problem. This trigger is also unreliable. If your success message appears outside the user's visible screen area (i.e., "below the fold"), the trigger will not fire until they scroll down—and many won't. Furthermore, it depends on specific HTML attributes like a Class or ID (
.form-success-message). If a developer updates the website and changes that ID, your tracking breaks without warning.
This is where Branchside's built-in event tracking provides a robust, professional solution.
How Built-in Event Tracking Works?
Forms can be configured in the Branchside admin panel to fire specific events after a successful submission. Instead of Google Tag Manager watching for clues (like a page load or a visible message), the form itself directly tells GTM, "Hey, a valid submission just happened".
Prerequisite: Google Tag Setup
Make sure you have your Google Tag (Base Configuration) implemented.
To do so, you can follow Step 1 and Step 2 from the Option 1: Tracking a "Thank You" Page Conversion section.
Here's how to set it up.
Add below code to your website. It is recommended to add this before the GTM code.
<script>
  window.dataLayer = window.dataLayer || [];
  function gtag() { window.dataLayer.push(arguments) }
</script>
Pro Tip:
If you don't have access to the website code, you can create a separate HTML tag inside the GTM and add above code.
To create your forms, follow the Starting guide.
In your form setting click on "Conversion Tracking". To track lead conversions, you simply select "Google Analytics 4" and generate_lead as an event.
In your GTM container, navigate to Triggers and click New.
Name your trigger something descriptive, like "Custom Event - Form Submission".
Click on Trigger Configuration.
Choose "Custom Event" as the type.

In the "Event name" field, enter the exact event name you used in your forms settings (e.g., generate_lead).

Save the trigger.
Create a "Google Ads Conversion Tracking" tag by following instructions in the previous section.
The only difference is the trigger - select the Custom Event trigger you've created.

Use Preview Mode to test the setup. Fill out and submit your form. In the preview console, you should see the generate_lead event appear on the left, and you'll see that your Google Ads Conversion Tracking tag fired successfully on that event.
Once confirmed, click Submit to publish your changes.
Now that your conversion tracking is ready, it's vital to ensure it operates in compliance with privacy regulations like the GDPR. Google Consent Mode is a framework that adjusts how your tags behave based on your users' consent choices. Properly implementing it is essential for collecting data responsibly and maintaining access to Google's full suite of advertising features.
To learn how to implement this correctly, please see our complete guide: How to Set Up Google Consent Mode v2.
Setting up Google Ads conversion tracking for forms is no longer a mystery. You have successfully navigated the entire process, from creating a foundational conversion action in your account to implementing the tag on your website.
Throughout this guide, you've seen that there is a solution for every type of website. Whether you chose the straightforward "Thank You" page method, the dynamic Element Visibility trigger, or the exceptionally robust Custom Event approach, the end result is the same: you have established a direct, reliable line of sight between your ad spend and the leads it generates.
The guesswork is over. You now have the critical data needed to:
-
Prove your ROI to stakeholders or clients.
-
Unlock the full power of Google's Smart Bidding strategies.
-
Make intelligent decisions about which keywords, ads, and landing pages truly work.
Your tracking is in place, and the data will soon start flowing. Now you can move forward with the confidence that every optimization you make is backed by accurate, actionable insights.
Leave a comment
The email address you provide will not be published. It will be used to notify you of any replies.