Meta Pixel Event Tracking with "Data Layer" and Google Tag Manager
You've successfully set up your Meta Pixel with Google Tag Manager and mastered tracking conversions based on URL visits – fantastic! That's a crucial first step in understanding how your Meta Ads are performing.
But what happens when the most valuable user actions on your site don't lead to a unique "thank you" page, or when you need to capture specific, dynamic data about those interactions? How do you track clicks on essential buttons with unique properties, form submissions that happen dynamically, or other critical interactions that signal deep engagement, especially when the details matter?
This is where advanced event tracking using the dataLayer comes into play. While basic tracking provides a foundation, to truly optimize your Meta Ad campaigns and gain granular insights, you often need a robust way to send custom information from your website directly to Google Tag Manager (GTM) and then to your Meta Pixel.
In this comprehensive guide, we'll dive deep into one of the most powerful techniques for advanced Meta Pixel event tracking: leveraging the dataLayer.push() method with GTM. We will specifically cover:
-
Understanding Meta Standard Events vs. Custom Events and how to decide what to send.
-
The step-by-step process of implementing
dataLayer.push()on your website to capture event details. -
Configuring GTM triggers and tags to listen for these
dataLayerevents and forward them accurately to your Meta Pixel, complete with any custom parameters. -
Thoroughly testing your implementation to ensure data accuracy.
By mastering the dataLayer method, you'll unlock richer, more contextual data, enabling more precise ad targeting, significantly improved campaign optimization, and ultimately, a better return on your Meta Ad spend. Let's get started!
Before diving into advanced Meta Pixel event tracking, make sure you have the following set up and are comfortable with these concepts:
-
Meta Pixel Installed via GTM. Your Meta Pixel base code should already be implemented on your website using Google Tag Manager. If you haven't done this yet, please refer to our guide: Meta Pixel with Google Tag Manager Setup.
-
Basic Understanding of HTML & JavaScript. A basic understanding of HTML and JavaScript will be highly beneficial for implementing and troubleshooting advanced tracking.
-
Access to Website Code. For implementing
dataLayer.push()events, you'll either need direct access to your website's code or be able to work with a developer who can add the necessary snippets.
Ensuring these prerequisites are met will make the following steps much smoother and help you successfully implement advanced event tracking.
Before we jump into the "how-to", it's important to understand a few key concepts that make advanced event tracking possible with Google Tag Manager and the Meta Pixel.
Think of the dataLayer as a structured information hub or a virtual layer on your website. It's essentially a JavaScript array that holds key-value pairs of data you want to pass from your website to Google Tag Manager (and subsequently to tools like Meta Pixel).
When a specific action occurs on your site (e.g., a user signs up for a newsletter), your website's code can "push" information about that event into the dataLayer. GTM constantly listens to this dataLayer for new information.
The dataLayer allows you to capture dynamic data (like product SKUs, form input values, user IDs, etc.) and custom event names that aren't readily available through simple URL observation or standard browser events. It’s the bridge for sending highly specific interaction data.
Example. A developer might add code like:
dataLayer.push({'event': 'newsletter_signup', 'form_id': '123456'});When a user submits a newsletter form. GTM can then use the newsletter_signup event to trigger a tag and capture the form_id.
Before you start configuring advanced event tracking in Google Tag Manager, it's crucial to understand the two main types of events you can send to your Meta Pixel: Standard Events and Custom Events. Choosing the right type of event ensures your data is meaningful, actionable, and helps Meta's systems optimize your ad delivery.
Standard Events are predefined actions that Meta recognizes across all advertisers. Using them helps Meta understand the actions users are taking on your website, which is essential for ad optimization, reporting, and building audiences.
-
ViewContent: user views a key page (e.g., product page, article). -
AddToCart: user adds an item to their shopping cart. -
Purchase: user completes a purchase. -
Lead: user submits information with the expectation of being contacted (e.g., signs up for a demo, submits a contact form). -
CompleteRegistration: user completes a registration form (e.g., register an account). -
Contact: user contacts your business (e.g., clicks a phone number, starts a chat). -
SubmitApplication: user submits an application (e.g., for a job, program). -
Subscribe: user subscribes to a paid product or service.
You can find full list of standard events on official Meta's documentation page.
-
Standardized Reporting. Allows for consistent tracking and reporting within Meta Ads Manager.
-
Optimization Power. Meta's algorithms are built to optimize ad delivery for these known actions.
-
Audience Building. Easily create audiences based on users who completed specific standard events.
-
Eligibility for Certain Ad Products. Some ad features or optimization goals may require the use of specific standard events (e.g., dynamic ads often use
ViewContent,AddToCart,Purchase).
Many Standard Events can be sent with additional pieces of information called "parameters". These provide more context about the event. Common parameters include:
-
value: the monetary value of the conversion (e.g., for aPurchaseorLead). -
currency: the currency code (e.g.,USD,EUR). -
content_name: name of the product, page, or item. -
content_ids: product IDs or SKUs.
Always prioritize using a Standard Event if the user action clearly maps to one of Meta's predefined events.
For example, if a user buys something, use the Purchase event. If they sign up for a newsletter, the Lead or CompleteRegistration event is appropriate.
Custom Events allow you to track actions specific to your website or business that don't neatly fit into any of Meta's Standard Event categories.
Events that you name and define yourself to track user interactions unique to your business goals.
Examples of Custom Events:
-
video_played_75p(if tracking video engagement beyond a simple "view"). -
ebook_download(if a standardLeadevent doesn't fully capture the nuance). -
used_specific_feature(for SaaS products). -
quiz_step_completed -
affiliate_link_click
-
Flexibility. Track virtually any interaction you deem valuable.
-
Granular Insights. Understand highly specific user behaviors.
-
Custom Audience Building. Create highly targeted audiences based on these unique actions.
-
Custom Conversions. You can create Custom Conversions within Meta Ads Manager based on your Custom Events to optimize campaigns for them (though optimization capabilities might not be as robust as for Standard Events).
Custom Events can also be sent with parameters to provide additional context. For example:
fbq('trackCustom', 'ebook_download', {
  // You can use standard parameters
  value: 25,
  currency: 'USD',

  // You can specify any custom parameters you need
  title: 'Advanced Marketing Strategies',
  topic: 'SEO'
});Use Custom Events when a user action is valuable to track for audience building or analysis, but it does not align well with any existing Standard Event. They are for the "everything else" that matters to your business.
Always reach for a Standard Event if one accurately describes the user action. If not, a well-named Custom Event is your best choice. This approach ensures Meta gets the clearest signals for optimization and reporting.
The dataLayer.push() method involves adding a small snippet of JavaScript code to your website. This code "pushes" information about an event, and any associated data, into the Data Layer. Google Tag Manager then listens for these pushes and uses them to trigger your Meta Pixel tags.
This method is ideal for:
-
Events triggered after specific server-side actions (e.g., a successful user registration confirmed by the backend).
-
Interactions with complex web application elements where GTM's built-in listeners might be insufficient or unreliable.
-
Passing rich, dynamic data about an event (e.g., product details, user-specific information, form input values before or after submission).
To use this method, you (or your developer) will need to add JavaScript code to your website that executes when the desired event occurs. The basic syntax is:
window.dataLayer.push({
  // This is the key GTM will listen for.
  'event': 'eventName',

  // Optional: Any other data parameters
  // you want to pass with the event
  'parameter1Name': 'parameter1Value',
  'parameter2Name': 'parameter2Value'
});
The event is crucial. This eventName is what you'll use to create a "Custom Event" trigger in GTM. The eventName can be a Meta Standard Event name (e.g., AddToCart, Lead) or a Custom Event name you define (e.g., demo_requested, video_milestone).
Example: Pushing a Meta Standard Event for "AddToCart"
This will send the standard AddToCart event with product details when user adds product to the cart:
window.dataLayer.push({
  'event': 'AddToCart', // Using a Meta Standard Event name
  'product_name': 'Super Widget',
  'product_sku': 'SW123',
  'price': 29.99,
  'currency': 'USD'
});
If you're not comfortable adding code yourself, provide clear specifications to your developer about what event name to use and what data needs to be pushed for each interaction.
In the example above, we used
'event': 'AddToCart', which matches Meta's Standard Event name. However, it's important to understand that the event value is primarily used by GTM to trigger your tags.You don't strictly have to use Meta's exact Standard Event name (like
AddToCart) in thedataLayer. For instance, you could push'event': 'add_to_cart'.GTM would then use
add_to_cartas an internal trigger. In the Meta Pixel tag configuration within GTM, you would then explicitly select theAddToCartStandard Event from the dropdown. This approach gives you flexibility if your website's internal event naming differs from Meta's.
Once the dataLayer.push() code is implemented on your site, you need to configure GTM to "listen" for it and send the data to your Meta Pixel.
In GTM, go to "Triggers".
Click "New".

Give your trigger a descriptive name (e.g. "DataLayer Event: AddToCart").
Click "Trigger Configuration" area.

Choose "Custom Event" as the type.

In the "Event name" field, enter the exact event name you used in your dataLayer.push() (e.g., AddToCart).
Save the trigger.

Now, create Meta Pixel tag to send the event data. We'll assume you're using the official Meta Pixel GTM template.
In your container, go to "Tags".
Click "New".

Give your tag a descriptive name (e.g., "Meta Tag: AddToCart").
Next click "Tag Configuration".

Under "Choose tag type", find and select the "Meta Pixel" tag template (or "Facebook Pixel").
This assumes you've already added the official Meta Pixel template to your GTM workspace, as covered in our first guide on installing the Meta Pixel with GTM
Enter your Meta Pixel ID into the "Facebook Pixel ID(s)".
For the Event Name you can choose either Standard or Custom type. For this example we'll continue with the Standard event AddToCart.

Later we'll show you, how you can add additional parameters to your event from the
dataLayerobject.
Scroll down and click on the "Triggering" box below the tag configuration.

Select the Custom Event trigger you created in Step 1.

Click the "Save" button in the top right corner.

Events may be sent with additional properties. There is one standard event Purchase that has required properties (currency and value).
In our dataLayer.push() example above, we are sending extra data to the GTM:
-
product_name -
product_sku -
price -
currency
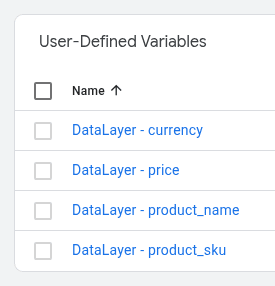
To capture additional data and use it for the Meta Pixel Event, we need to create Data Layer Variables first.
In GTM, go to "Variables".

Under "User-Defined Variables," click "New".

Give your variable a descriptive name (e.g. "DataLayer - product_name").
Next, click on "Variable Configuration" box.

Choose "Data Layer Variable" as the type under the "Page Variables".

In the "Data Layer Variable Name" field, enter the exact key name used in your dataLayer.push() (e.g., product_name or price).

Save the variable.
Repeat above process for each piece of custom data you want to capture from the dataLayer.push().
Now let's go back to your tag you have created earlier in Step 2.
Under "Object Properties" Click "Add Property".
In the "Property Name" field, enter the Meta Pixel property key.
To use variable, click on the "+" sign next to the "Property Value" field.

Select the corresponding Data Layer Variable you created.

In the example below you can see, that we have set 4 different properties.
Please note, that for the
content_idsproperty, Meta often expects an array, especially for dynamic ads or if you might have multiple SKUs. To sendproduct_skuas a single-item array, we've formatted it as["{{DataLayer - product_sku}}"].

Save all the changes.
After we've gone through all the steps above, we need to test if everything works correctly.
We'll guide you through 2 main methods/tools to test your implementation:
Click the "Preview" button in the top right.

Enter your website's URL and click "Connect".

Perform the action on your site that triggers your dataLayer.push().
In the Preview Mode console, look for your custom event name (e.g., AddToCart) in the event timeline on the left.

Click on the event. Go to the "Data Layer" tab to verify the correct data was pushed.

Go to the "Variables" tab to ensure your Data Layer Variables are populating correctly.

Go to the "Tags" tab to confirm your Meta Pixel tag fired on that event.

You can use Meta Pixel Helper Browser Extension to test events directly while you are browsing the page. Here is detailed instruction on how Verify Events with Meta Pixel Helper.
Go to your Meta Business Suite.
From the main menu click on "All tools".

Find and select "Events Manager".

In Events Manager, on the left-hand side, click on "Data sources".
Next, click on your Meta Pixel.
Go to the "Test Events" tab.

Now, refresh your web page in GTM preview mode.
Next, trigger the dataLayer.push() action again.
After a few seconds, you will see events in the table.
You can click on the event to check the data that was received by Meta.
In our example we can see all the details about our AddToCart event.

By following these steps, you can robustly track a wide array of specific user interactions and their associated data, sending valuable signals to your Meta Pixel for improved ad targeting and optimization.
Implementing dataLayer.push() offers incredible flexibility for tracking, but following best practices ensures data accuracy, maintainability, and compliance with privacy regulations.
Before you start implementing, meticulously plan the data you need to capture for each event.
Create a clear document (e.g., a spreadsheet) outlining:
-
The event name.
-
Each parameter you'll send.
-
The data type of each parameter (e.g., string, number, boolean).
-
The source of the data (e.g., a form field ID, a product SKU from your database).
Consistency is key. Use consistent naming conventions for event names and parameters across your website. This will simplify your GTM setup and make it easier to troubleshoot.
As emphasized previously, prioritize Meta's Standard Events (e.g., Purchase, AddToCart, Lead) whenever a user action fits.
Use Custom Events only for actions not covered by Standard Events.
Choose event names that are easy to understand and reflect the actual user action.
Examples of good custom event names:
-
newsletter_signup, -
video_completed_100percent, -
ebook_download_success.
Avoid generic names (e.g., event1, custom_event).
Include as much relevant data as possible with each event. The more data you send, the more insights and targeting options you'll have.
Refer to Meta's documentation for the recommended parameters for each Standard Event.
For Custom Events, carefully choose parameters that will allow you to segment and analyze the data effectively.
Place your dataLayer.push() code in the correct location. Ensure it runs after the data is available. For example, if you're tracking a form submission, the dataLayer.push() code should execute after the form submission is successful and the relevant data is available.
Double-check that the data you're pushing is correct and free of errors. Validate form inputs and product data before sending it to the dataLayer.
Use window.dataLayer.push({...}) to add events. This ensures you are pushing to the globally scoped Data Layer array that GTM is listening to, preventing potential issues if a local dataLayer variable gets inadvertently created.
After implementing a new event, thoroughly test it using GTM Preview Mode and the Meta Pixel Helper.
Verify that the data is being captured correctly and that the parameters are populated as expected.
Ensure the tracking works across different devices and browsers.
If you make changes to your website, re-test your dataLayer event tracking to ensure it's still working correctly.
Do not collect Personally Identifiable Information (PII) unless you have explicit user consent. This includes sensitive data like names, email addresses, phone numbers, and precise location data.
Consider anonymizing or hashing any user identifiers you do collect.
Clearly communicate your data collection practices in your privacy policy.
Comply with all relevant privacy regulations (e.g., GDPR, CCPA). You can read our guide on how to implement Google Consent Mode V2.
By adhering to these best practices, you'll maximize the value of your dataLayer event tracking, get accurate and insightful data, and maintain compliance with privacy regulations.
You've now explored the ins and outs of leveraging the dataLayer.push() method with Google Tag Manager for robust Meta Pixel event tracking. By pushing specific event information and custom parameters directly from your website into the Data Layer, you gain unparalleled control and granularity over the data sent to Meta.
This method moves you far beyond basic page view tracking, allowing you to capture the nuanced interactions that truly define user engagement and conversion paths on your site. Whether it's tracking detailed product interactions, dynamic form submissions, or unique feature usage, the dataLayer provides the flexible bridge needed for rich data collection.
The ability to send precise event names and a wealth of contextual parameters directly to your Meta Pixel empowers you to:
-
Create highly targeted custom audiences.
-
Optimize your ad campaigns with much richer signals.
-
Gain deeper, more actionable insights into user behavior.
-
Ultimately, improve your Meta advertising ROI.
While setting up dataLayer events requires careful planning and often collaboration with developers, the payoff in terms of data quality and advertising effectiveness is significant. We encourage you to implement the steps outlined in this guide, test thoroughly, and start unlocking the full potential of your Meta Pixel.
Remember, this dataLayer method is one powerful tool in your advanced tracking toolkit. Stay tuned for further guides where we'll explore other techniques, such as using GTM's built-in listeners for click and form tracking, to round out your event tracking mastery.
Happy tracking!
Leave a comment
The email address you provide will not be published. It will be used to notify you of any replies.