Embedding form
Once you've created your form, you'll need to embed it on your website. This is a simple process of copying and pasting two code snippets.
You can place the form anywhere on your site.
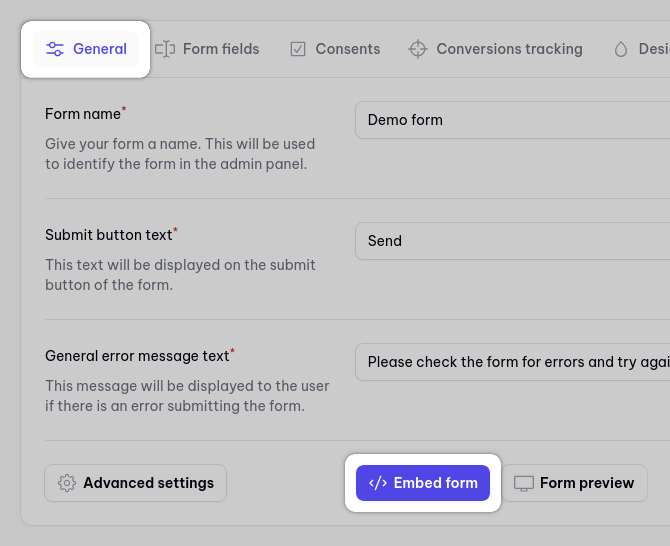
After creating your form, go to the General tab and click the "Embed Form" button.

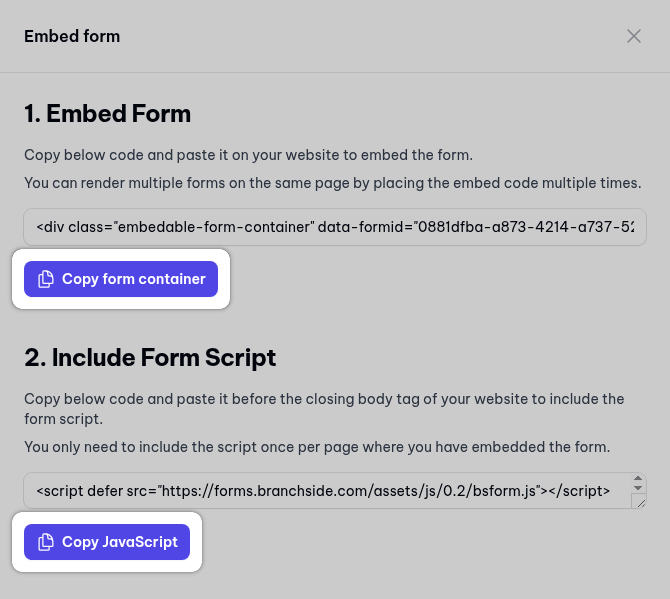
A sidebar will open with two code snippets.
First Code Snippet (Form Placement): copy this code and paste it into your website's HTML code exactly where you want the form to appear.
Second Code Snippet (JavaScript): copy this code and paste it anywhere within your website's HTML before the closing </body> tag. It does not need to be near the first code snippet.
Important!
You only need to add the JavaScript snippet once to each page, even if you have multiple forms. The script is designed to automatically find and manage every Branchside form on that page.

You can pre-fill your form fields with default values. This is useful for tracking where submissions come from, personalizing forms, or passing data between pages. There are two methods for setting default values.
For simple, static values, you can add a special data-field-* attribute directly to the form's div element.
The format is data-field-<YOUR_FIELD_NAME>="Your Value". Replace <YOUR_FIELD_NAME> with the name of the field you want to pre-fill.
Example: setting a default page name for a hidden field
Let's say your form has a hidden field with the name page. To set its value to "Main page", you would modify the embed code like this:
<div class="embedable-form-container"
     data-formid="<YOUR_FORM_ID>"
         data-field-page="Main page">
</div>
This is especially useful with hidden fields to "tag" submissions based on the page or context where the form was submitted.
For more complex scenarios, like capturing URL parameters, you can use JavaScript.
Our script fires a branchside:formReady event on the document once the form is fully loaded and ready to be interacted with. You can listen for this event to run your own custom code.
To make updating fields easier, we provide a helper function:
bsSetFieldValueFromEvent(event, fieldName, value)
-
event: the event object passed by the event listener. -
fieldName: the name of the form field you want to set. -
value: the value you want to set for that field.
Example: capturing UTM Parameters from the URL
This code captures UTM parameters from the current page's URL and sets them as values for hidden fields named utm_source, utm_medium, and utm_campaign.
<script>
  var urlParams = new URLSearchParams(window.location.search);

  document.addEventListener('branchside:formReady', function(event) {
    bsSetFieldValueFromEvent(event, 'utm_source', urlParams.get('utm_source') || '')
    bsSetFieldValueFromEvent(event, 'utm_medium', urlParams.get('utm_medium') || '')
    bsSetFieldValueFromEvent(event, 'utm_campaign', urlParams.get('utm_campaign') || '')
  });
</script>